Ball and Beam System
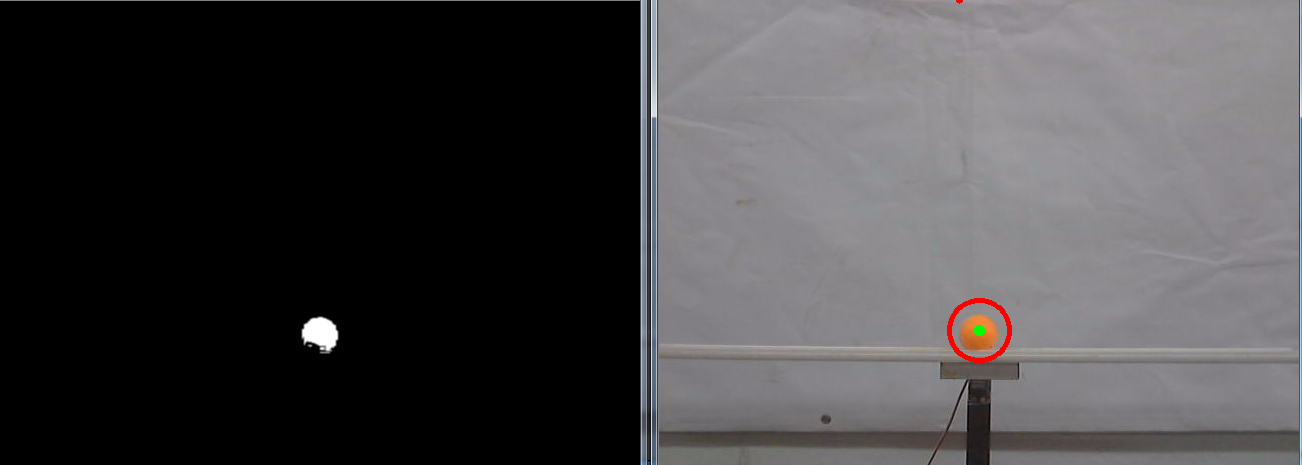
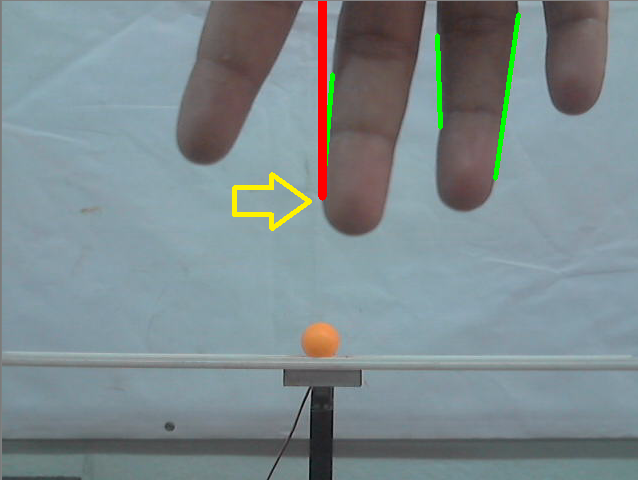
The "Ball on Beam" project is a PID-controlled system designed to achieve precise control and balance of a ball moving along a linear beam. Previous methods use potentiometer to set the desired position. Instead, we use hand gesture to set the ball's position on the beam. We use simple image processing techniques such as HSV thresholding to isolate the ball and OpenCV's "moments" to calculate the center of the ball. Similarly, we use Hough Transform to compute the setpoint from the hand pose.
My setup had following things: 1. A laptop with webcam 2. A PIC microcontroller (PIC16f877A) 3. A USB to Serial module 4. A home-made ball and beam setup attached to a Servo motor
I implemented the control logic using a Python script, which can be found at the end of this post. The purpose of the algorithm is to control the movement of a tennis ball along a beam. which is a low-cost wire cover with a groove that allows the ball to move in a straight path. The beam is attached to a fixed support and is manipulated by a servo motor. The servo motor is controlled by a PIC microcontroller, and the extent of movement is communicated from my laptop to the PIC via a USB-Serial module.
The data sent from the laptop to the PIC microcontroller is the desired angle at which the servo motor should move. This angle is calculated based on the position of the ball and the desired setpoint. To achieve precise control over the system, a proportional-integral-derivative (PID) control algorithm is employed. The PID controller provides feedback to the entire system, allowing for adjustments and corrections in real-time.
In summary, the Python script on my laptop calculates the desired angle for the servo motor based on the ball's position and setpoint. This information is then transmitted to the PIC microcontroller via a USB-Serial module, which converts it into an appropriate electrical signal to drive the servo motor. The PID control algorithm ensures accurate control and feedback for the system. If you would like to see the specific details of the Python script, please refer to the code and the video provided below.